GitHub Actions with .NET, Part 4 - Building an S3 bucket with Pulumi
Want to learn more about AWS Lambda and .NET? Check out my A Cloud Guru course on ASP.NET Web API and Lambda.
Full source code available here.
- Part 1 - Hello World and Downloading the Artifact
- Part 2 - Dependant Jobs
- Part 3 - Manual Approvals
- Part 4 - Building an S3 bucket with Pulumi
- Part 5 - Build a .NET Application and Upload to S3
This is a small post showing how to create an AWS S3 bucket using GitHub Actions and Pulumi, and in the next post I’ll show how to use GitHub Actions to deploy an artifact from GitHub Actions to that S3 bucket.
This post and the next are a pair, one using Actions to build the infrastructure, and the next using Actions to leverage the built infrastructure.
The Basics
You need a GitHub account, a Pulumi account, and an AWS account. AWS offers a free tier, this is something I discussed with Martin Beeby on a podcast we made.
GitHub Secrets
Once you have the required accounts, generate tokens for GitHub to access AWS and Pulumi.
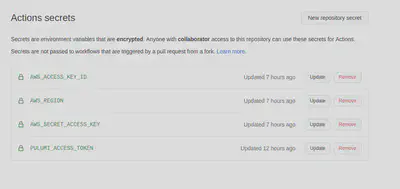
In your repository, go to Settings, then Secrets. Add the below secrets.
That’s all on the secrets side.
The Pulumi Stack
I’ve written a few posts about Pulumi, they should get you going if you have never used it before.
This stack setups up a single S3 bucket, nothing more. It does NOT lockdown access to it, files you upload will be available publicly. If you want to see how to block public access to the bucket see this post.
 1using Pulumi;
 2using S3 = Pulumi.Aws.S3;
 3using Aws = Pulumi.Aws;
 4
 5class MyStack : Stack
 6{
 7    public MyStack()
 8    {
 9        // Create an AWS resource (S3 Bucket)
10        string resource_prefix = "PulumiGitHubAction";
11
12        var s3Bucket = new S3.Bucket($"{resource_prefix}_S3Bucket", new S3.BucketArgs
13        {
14            BucketName = "pulumi-github-action-s3-bucket-for-artifacts",
15            Versioning = new Aws.S3.Inputs.BucketVersioningArgs
16            {
17                Enabled = true,
18            },
19        });
20
21        // Export the name of the bucket
22        this.BucketName = s3Bucket.BucketName;
23    }
24
25    [Output]
26    public Output<string> BucketName { get; set; }
27}
The Workflow
To run GitHub Actions, a workflow file is needed. Add a .github/workflows directory.
Add the below file and name it with a .yaml extension. This will build the Pulumi binary, and run pulumi up, passing in the AWS credentials.
 1name: Create S3 Bucket for Artifacts
 2on:
 3  push:
 4    branches: [ main ]
 5jobs:
 6  up:
 7    name: Pulumi up
 8    runs-on: ubuntu-latest
 9    steps:
10      - uses: actions/checkout@v2
11      - name: Setup .NET
12        uses: actions/setup-dotnet@v1
13        with:
14          dotnet-version: 3.1.x
15      - name: Restore dependencies
16        run: dotnet restore
17      - name: Build
18        run: dotnet build --no-restore
19      - name: Configure AWS Credentials
20        uses: aws-actions/configure-aws-credentials@v1
21        with:
22          aws-access-key-id: ${{ secrets.AWS_ACCESS_KEY_ID }}
23          aws-region: ${{ secrets.AWS_REGION }}
24          aws-secret-access-key: ${{ secrets.AWS_SECRET_ACCESS_KEY }}
25      - run: npm install
26      - uses: pulumi/actions@v3.1.0
27        with:
28          command: up
29          stack-name: dev
30        env:
31          PULUMI_ACCESS_TOKEN: ${{ secrets.PULUMI_ACCESS_TOKEN }}
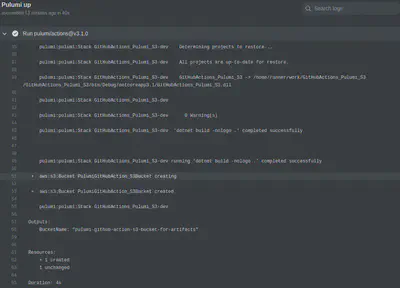
When this code is pushed to GitHub, the Action will kick off. You should see output that looks like this.
Note lines 58 and 62, one bucket created.
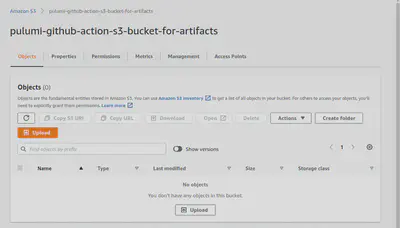
And in AWS, here is the bucket.
Full source code available here.


