C# and AWS Lambdas, Part 6 – .NET 5 inside a Container inside a Lambda
Want to learn more about AWS Lambda and .NET? Check out my A Cloud Guru course on ASP.NET Web API and Lambda.
Full source code available here.
- Part 1 - Hello World
- Part 2 - Web API and an API Gateway
- Part 3 - Pulumi IaC for Web API and an API Gateway
- Part 4 - Storing the Zip in S3, Setup with Pulumi IaC
- Part 5 - Updating the Zip in S3 and Updating the Running Lambda, with Pulumi IaC
- Part 6 - .NET 5 inside a Container inside a Lambda
- Part 7 - .NET 5 Web API inside a Container inside a Lambda, with API Gateway in front
- Part 8 - .NET 6, inside a Container, inside a Lambda
A few months ago AWS released a feature allowing Lambdas to run container images, for larger applications this is easier to work with than a zip file or set of layers, it also lets you move your already containerized apps to Lambda with a small effort.
I was interested to see if I could get a .NET 5 “Hello World” application running in this manner. There is a blog on the AWS site explaining how to do this with Visual Studio and the AWS Toolkit, but primarily use VS Code so I could not leverage those tools, and it would be fun to figure out.
UPDATE 1
When I published this blog post I was unaware of a pre-made .NET 5 Docker image for AWS Lambda so I built my own following instructions found on an AWS GitHub repo. Those instructions are below.
But it is much easier to use the AWS provided image available here - https://gallery.ecr.aws/lambda/dotnet and use public.ecr.aws/lambda/dotnet:5.0.
UPDATE 2
The AWS Lambda image above seems to have the full .NET 5 ASP.NET Runtime as opposed to the .NET 5 Runtime, if all you are running in the container is a library, then having the full .NET 5 ASP.NET Runtime will be larger than you need. As of now, I don’t see an image on the AWS ECR page for the .NET 5 Runtime. But you can build it yourself following the below instructions, with one change, on line 49 of this file https://github.com/aws/aws-lambda-dotnet/blob/087590ce99274e16e26d37e1dfd73b0b71d1230a/LambdaRuntimeDockerfiles/dotnet5/Dockerfile, change the linked tar.gz to the appropriate file in here https://versionsof.net/core/5.0/.
Building your own base image (optional)
You can’t use just any docker image for a .NET 5 application, it has to have special Lambda and AWS components included, here is how to build your own, if you want to, from the AWS code on GitHub.
- clone https://github.com/aws/aws-lambda-dotnet
- build this image https://github.com/aws/aws-lambda-dotnet/blob/master/LambdaRuntimeDockerfiles/dotnet5/Dockerfile
- reference this built image in the Dockerfile as the base
But it is much easier to use the one image AWS provides - https://gallery.ecr.aws/lambda/dotnet. Now that you have a base image, let’s move to the application.
Building the hello world container
Create a new .NET Lambda using -
dotnet new lambda.EmptyFunction --name HelloWorldLambdaContainerThis creates a simple library that converts an input string to uppercase. If you wanted to, you could build this, zip it, and deploy it to a Lambda as I showed in part 1 of this series.
But I want to put this in a container.
You need Docker for the rest of this, there are plenty of tutorials out there including one from my friend Steve Gordon.
In the source code directory add a file named Dockerfile with the below content. Note that it’s using the image I put on Docker Hub.
 1FROM public.ecr.aws/lambda/dotnet:5.0 AS base
 2
 3FROM mcr.microsoft.com/dotnet/sdk:5.0-buster-slim as build
 4
 5WORKDIR /source
 6
 7COPY *.csproj .
 8RUN dotnet restore
 9
10COPY . .
11RUN dotnet publish --no-restore -c Release -o /app/publish
12
13FROM base AS final
14WORKDIR /var/task
15COPY --from=build /app/publish .
16CMD ["HelloWorldLambdaContainer::HelloWorldLambdaContainer.Function::FunctionHandler"]
Everything is in place, build the image.
docker build -t helloworldlambdacontainer .Over in AWS we need a repository to store the image.
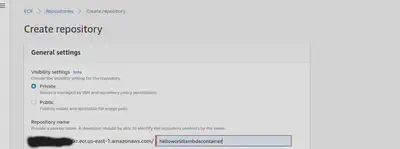
Go to the Elastic Container Registry.
Create a repository.
Navigate into the repository and you will see a button labeled “View push commands”. Follow those instructions to upload the container image to the repository.
That’s everything done here, over to the Lambda.
The Lambda
This is similar to what I showed in part one, but this time the function will be based on a container image.
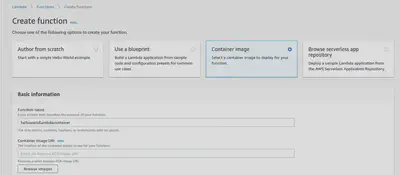
Create a new Lambda function, select Container image from the options.
Give the function a name.
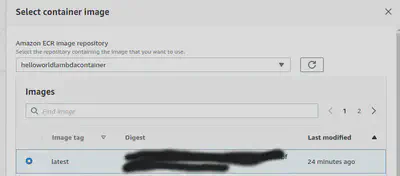
Hit Browse images, and select the container image from the repository created above.
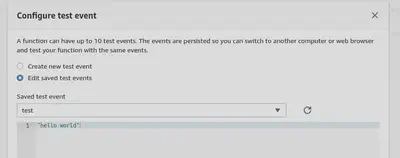
It will take a few moments for AWS to create the function. Once it is up, open the test tool in the top right of the screen and click “Configure test events”.
Set the event name, and replace the body with this - “hello world”.
Hit the “Test” button in the top right.
You should see something like - “Execution result: succeeded(logs)”. Expand the Details and you will see “HELLO WORLD” and a bunch of other information about the execution of the Lambda.
That is a .NET 5 library running inside a container, running inside a Lambda, not bad!
But what if you could get Kestrel up and running and map API Gateway requests to it, that would be fun…and that’s in the next post of this series.
Full source code available here.


