C# and AWS Lambdas, Part 2 - Web API and an API Gateway
Want to learn more about AWS Lambda and .NET? Check out my A Cloud Guru course on ASP.NET Web API and Lambda.
Full source code available here.
- Part 1 - Hello World
- Part 2 - Web API and an API Gateway
- Part 3 - Pulumi IaC for Web API and an API Gateway
- Part 4 - Storing the Zip in S3, Setup with Pulumi IaC
- Part 5 - Updating the Zip in S3 and Updating the Running Lambda, with Pulumi IaC
- Part 6 - .NET 5 inside a Container inside a Lambda
- Part 7 - .NET 5 Web API inside a Container inside a Lambda, with API Gateway in front
- Part 8 - .NET 6, inside a Container, inside a Lambda
In the previous post I created a Lambda that executed a C# console application. In this post, I walk through creating a .NET Core 3.1 Web API application inside a Lambda and making it reachable from the web, just like a normal Web API application.
First, update the Lambda tools, they have fixed a bug in the csproj file of the template, that I described in the first post of this series.
dotnet new -i Amazon.Lambda.Templates::5.1.0Create a new application.
dotnet new serverless.AspNetCoreWebAPI --name WebAPILambdaIn LambdaEntryPoint.cs change the class it inherits from to Amazon.Lambda.AspNetCoreServer.APIGatewayHttpApiV2ProxyFunction.
For the sake of this demo, I’m going to change very little, and show a GET and a POST call.
Add a Person class.
 1namespace WebAPILambda.Models
 2{
 3    public class Person
 4    {
 5        public string FirstName { get; set; }
 6        public string LastName { get; set; }
 7
 8        public override string ToString()
 9        {
10            return $"{FirstName} {LastName}";
11        }
12    }
13}
Replace the ValuesController class with this -
 1[Route("api/[controller]")]
 2public class ValuesController : ControllerBase
 3{
 4
 5    [HttpGet]
 6    public string Get()
 7    {
 8        return $"Hello World from inside a Lambda {DateTime.Now}";
 9    }
10
11    [HttpGet("{id}")]
12    public string Get(int id)
13    {
14        return $"You asked for {id}";
15    }
16
17    [HttpPost]
18    public IActionResult Post([FromBody] Person person)
19    {
20        return Ok($"You sent {person.ToString()}");
21    }
22}
Build it. You can try it by starting the application locally and use as a normal Web API application.
Zip the contents of the WebAPILambda/bin/Debug/netcoreapp3.1 directory in a file named WebAPILambda.zip.
We’re done with the code.
Create the Lambda
I’m not going to show the detailed steps because they are described in part 1 of this series of posts.
But there is one difference - make this the handler WebAPILambda::WebAPILambda.LambdaEntryPoint::FunctionHandlerAsync.
Upload the zip as shown in part 1.
You should be able to paste in the content of the test/WebAPILambda.Tests/SampleRequests/ValuesController-Get.json from the source code into the Lambda test feature, but the Json generated by the template does NOT work with a LambdaEntryPoint that inherits from APIGatewayHttpApiV2ProxyFunction.
That’s the Lambda setup.
Now we need to send some web requests to it.
API Gateway
There are a few choices here, I am going to show how to use the HTTP API because it is simpler.
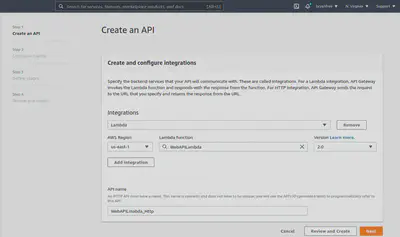
Click Create API.
Top of the list should be HTTP API, click Build.
Hit Add integration, choose Lambda and pick the Lambda function defined in the previous step. Select Version 2.0. Give the API a name. Hit next.
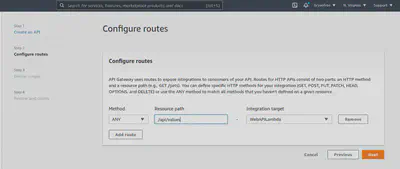
For route configuration leave the METHOD as ANY.
Change resource path to /api/values - this matches the route in the Web API controller in the application.
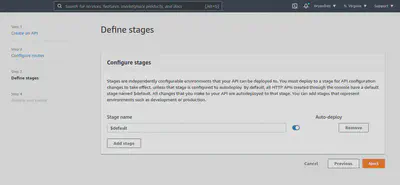
In Configure Stages don’t change anything for this simple example. Hit next.
In Review and Create confirm that it looks correct and hit Create in the bottom right.
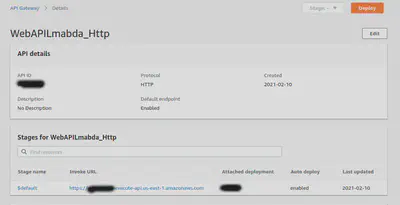
You should now have an API Gateway setup that looks something like this -
Click on the Invoke URL and you should get a response like -
{ message: “Not Found” }
Change the URL to include the route of the controller and by adding /api/values and you will get -
That is hitting the GET method. In the attached source code there is a file named test.http, it has an example of a POST method.
There you go, an API inside a Lambda reachable from the web! Not so hard after you’ve done it once.
Full source code available here.


